Exporting ArcGIS feature attributes to AutoCAD file as text elements is a common task when transferring spatial data between different software. This process is often used when sharing spatial data with other professionals who use AutoCAD for drafting or design work.
Here are the steps to export ArcGIS feature attributes to the AutoCAD file as text elements using a point feature class and reserved CADType and TxtValue CAD fields:
Step 1: Create a Point Feature Class
The first step is to create a point feature class in ArcGIS. This feature class will be used to store the data that will be exported to AutoCAD. You can create a new feature class or use an existing one.
Step 2: Add the Reserved CADType and TxtValue CAD Fields
Add two new fields to the feature class named CADType and TxtValue. These fields are reserved by AutoCAD and will be used to store the text data that will be exported.
Step 3: Populate the CADType and TxtValue Fields
Populate the CADType and TxtValue fields with the appropriate values. The CADType field should be populated as ‘TEXT’ for all features, and the TxtValue field should be set to the attribute value you want to export as text.
Step 4: Export the Feature Class to AutoCAD
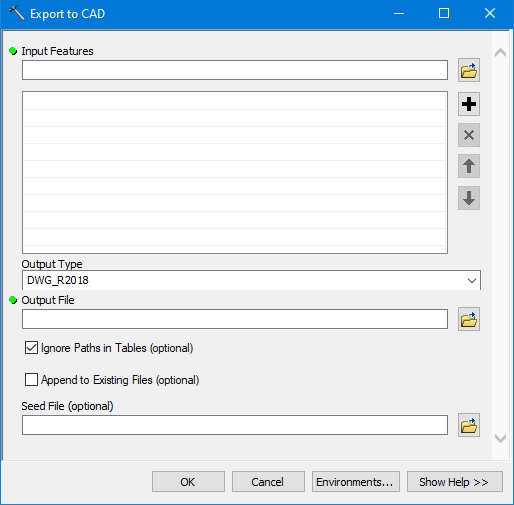
Once the CADType and TxtValue fields are populated, export the feature class to AutoCAD. To do this, open the ArcGIS Toolbox and navigate to Conversion Tools > To CAD > Export to CAD.

In the Export to CAD dialog box, select the point feature class you want to export and set the output format to AutoCAD DWG. Click the “Environments” button and set the “CAD Format” to AutoCAD Release 2004.
Step 5: Map the Fields in the Export to CAD Dialog Box
In the Export to CAD dialog box, click the “Fields” button to map the CADType and TxtValue fields to AutoCAD. In the Fields Mapping dialog box, map the CADType field to the reserved field “Entity Type” and the TxtValue field to the reserved field “Text.”
Step 6: Export the Feature Class
Click the “OK” button in the Fields Mapping dialog box to return to the Export to CAD dialog box. Click the “OK” button to export the feature class to AutoCAD.
Step 7: Open the AutoCAD File
Open the AutoCAD file in which you want to import the feature class. Type “-INSERT” at the command prompt and select the DWG file you exported from ArcGIS. Click the “Open” button.
Step 8: Import the Text Elements
In the Insert dialog box, click the “Specify On-Screen” option in the Insertion Point section. Click on the location where you want to insert the text elements. Click the “OK” button.
The exported text elements will now be inserted into the AutoCAD drawing.
Bottom Line
Exporting ArcGIS feature attributes to AutoCAD file as text elements can be challenging. However, following the above steps, you can easily export the data using a point feature class and reserved CADType and TxtValue CAD fields. This will allow you to use the data in AutoCAD to label features, create tables, or use them in other ways.